Most developers are familiar with Git: the version control system that tracks changes to code. GitLab goes far beyond Git. It’s an end-to-end DevOps platform that manages your entire software lifecycle. From code hosting, version control, and CI/CD automation to security scanning and deployment, GitLab covers it all. If you’ve used GitHub or Bitbucket, GitLab may feel familiar. However, it is fundamentally different. Understanding its structure and workflow will help you unlock its full potential.
GitLab vs. GitHub vs. Bitbucket
Before diving into the details of GitLab, here is a quick comparison of GitLab, GitHub, and Bitbucket.
GitLab for Beginners: Projects vs. Groups
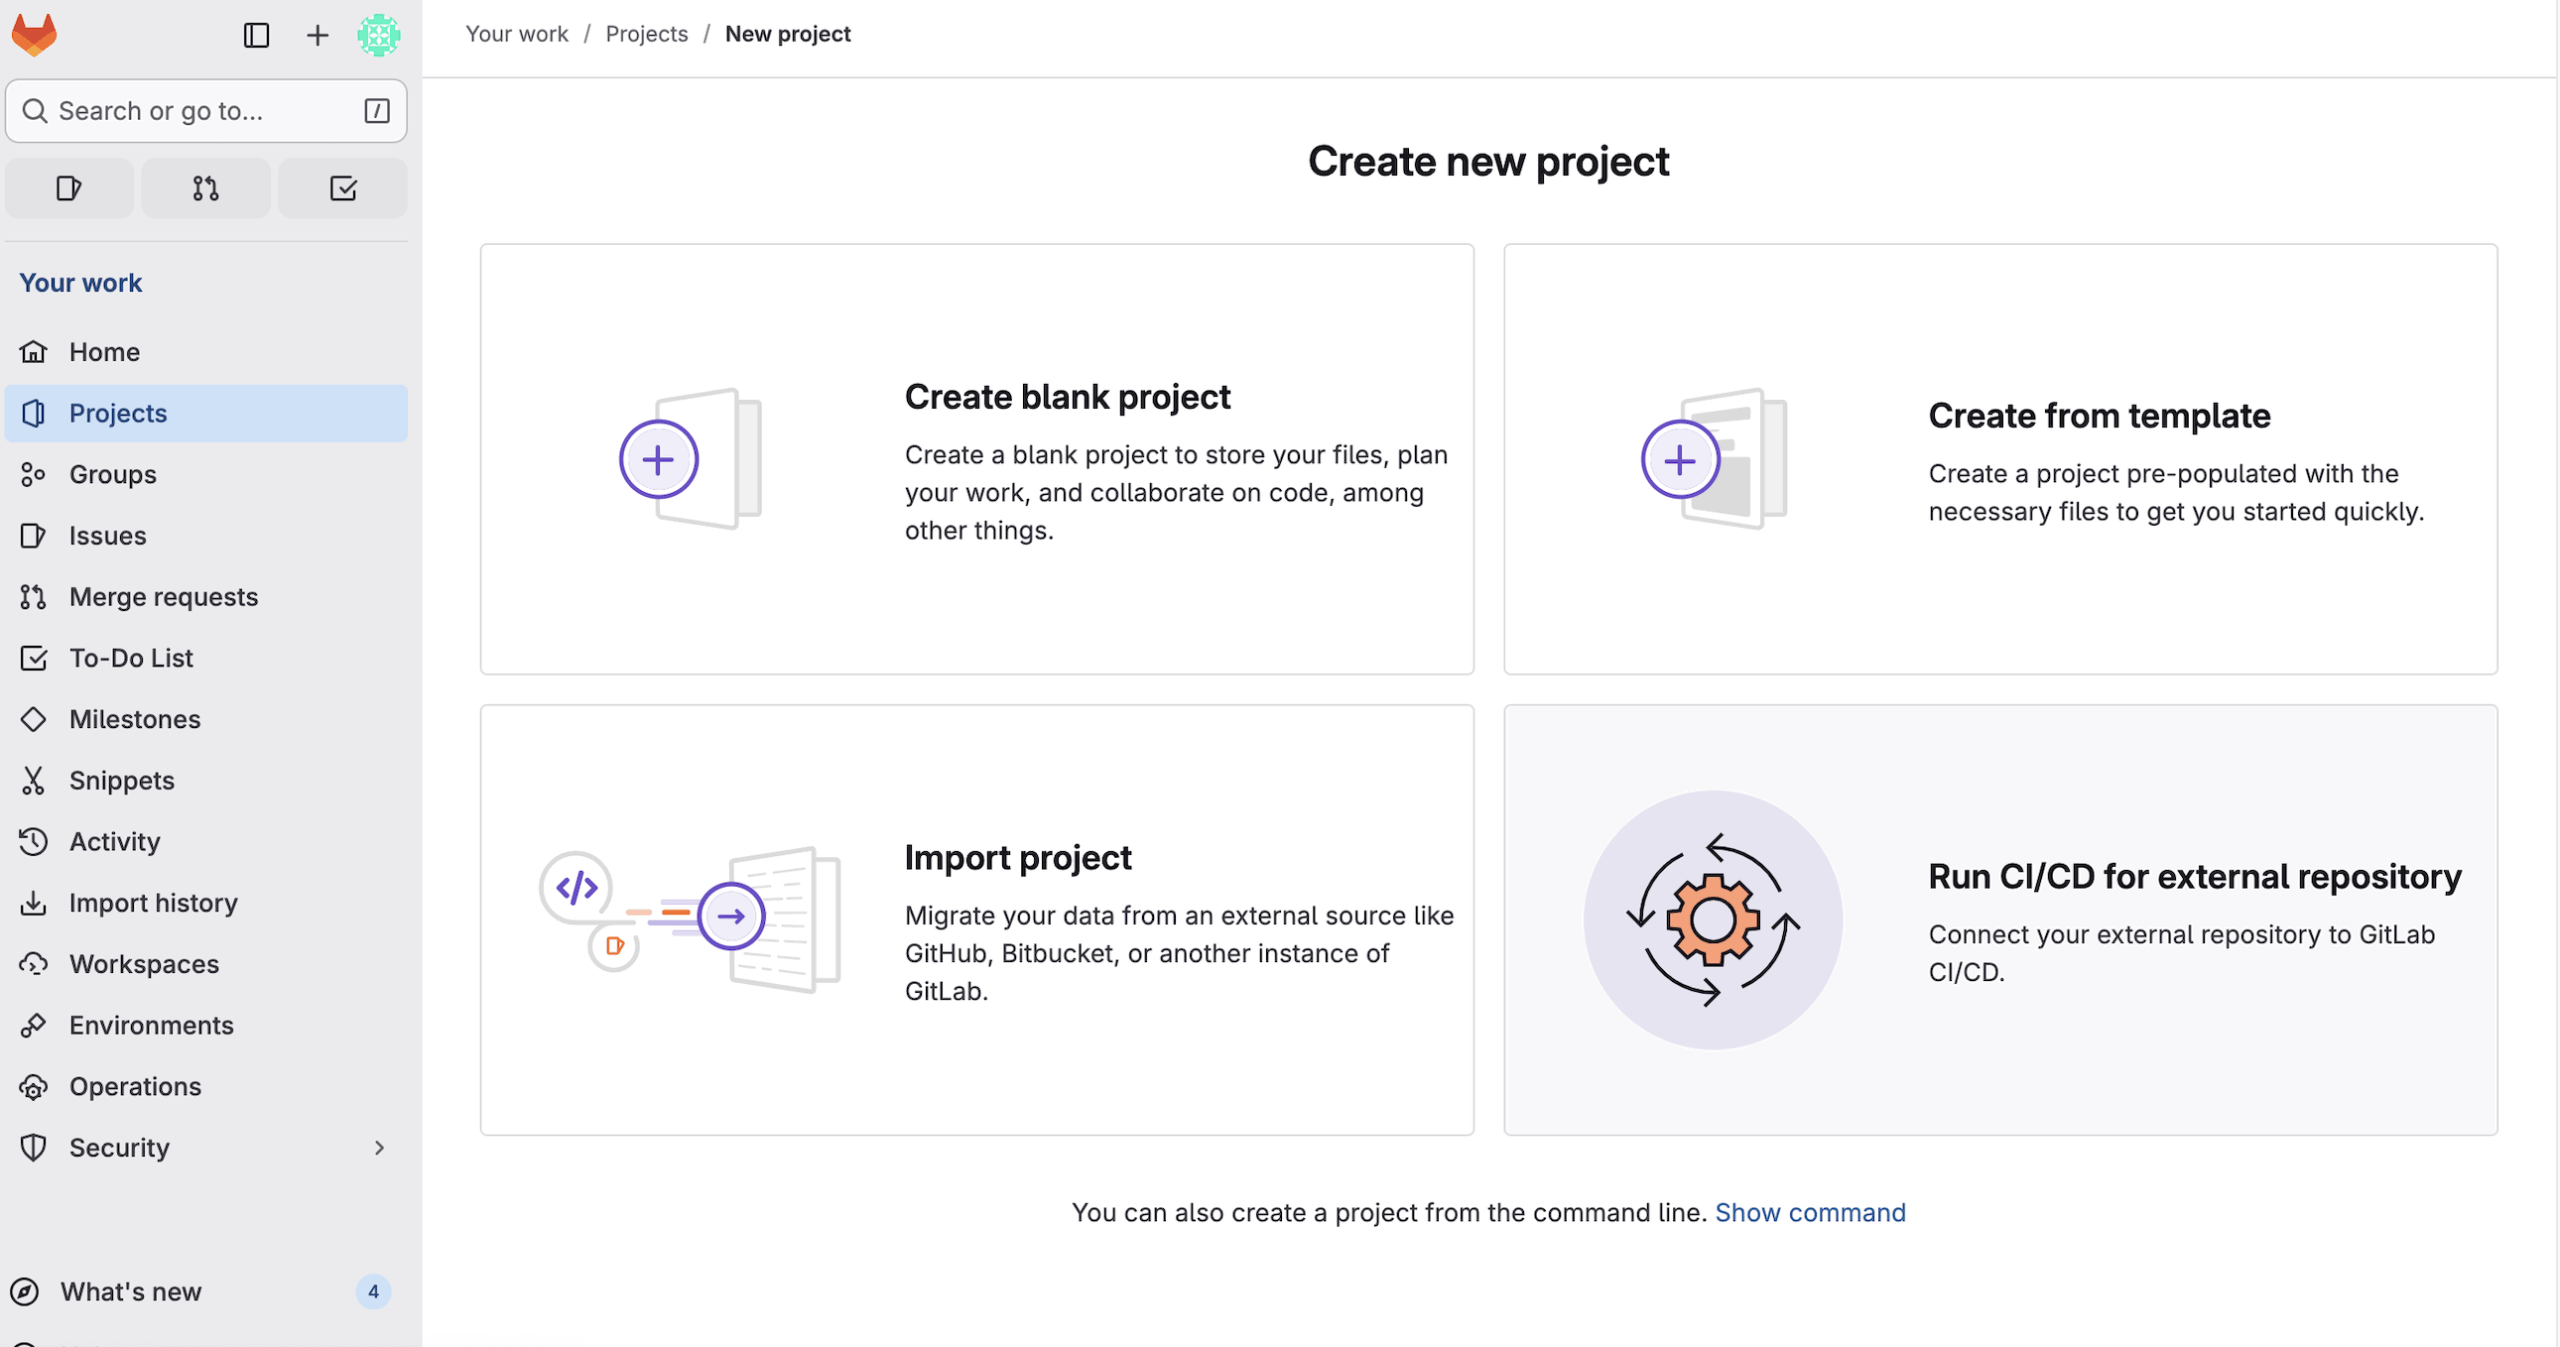
Now that we have covered a bit about GitLab’s unique features, let’s dive into the basics. In GitLab, everything revolves around Projects and Groups, which form the foundation of how work is organized.
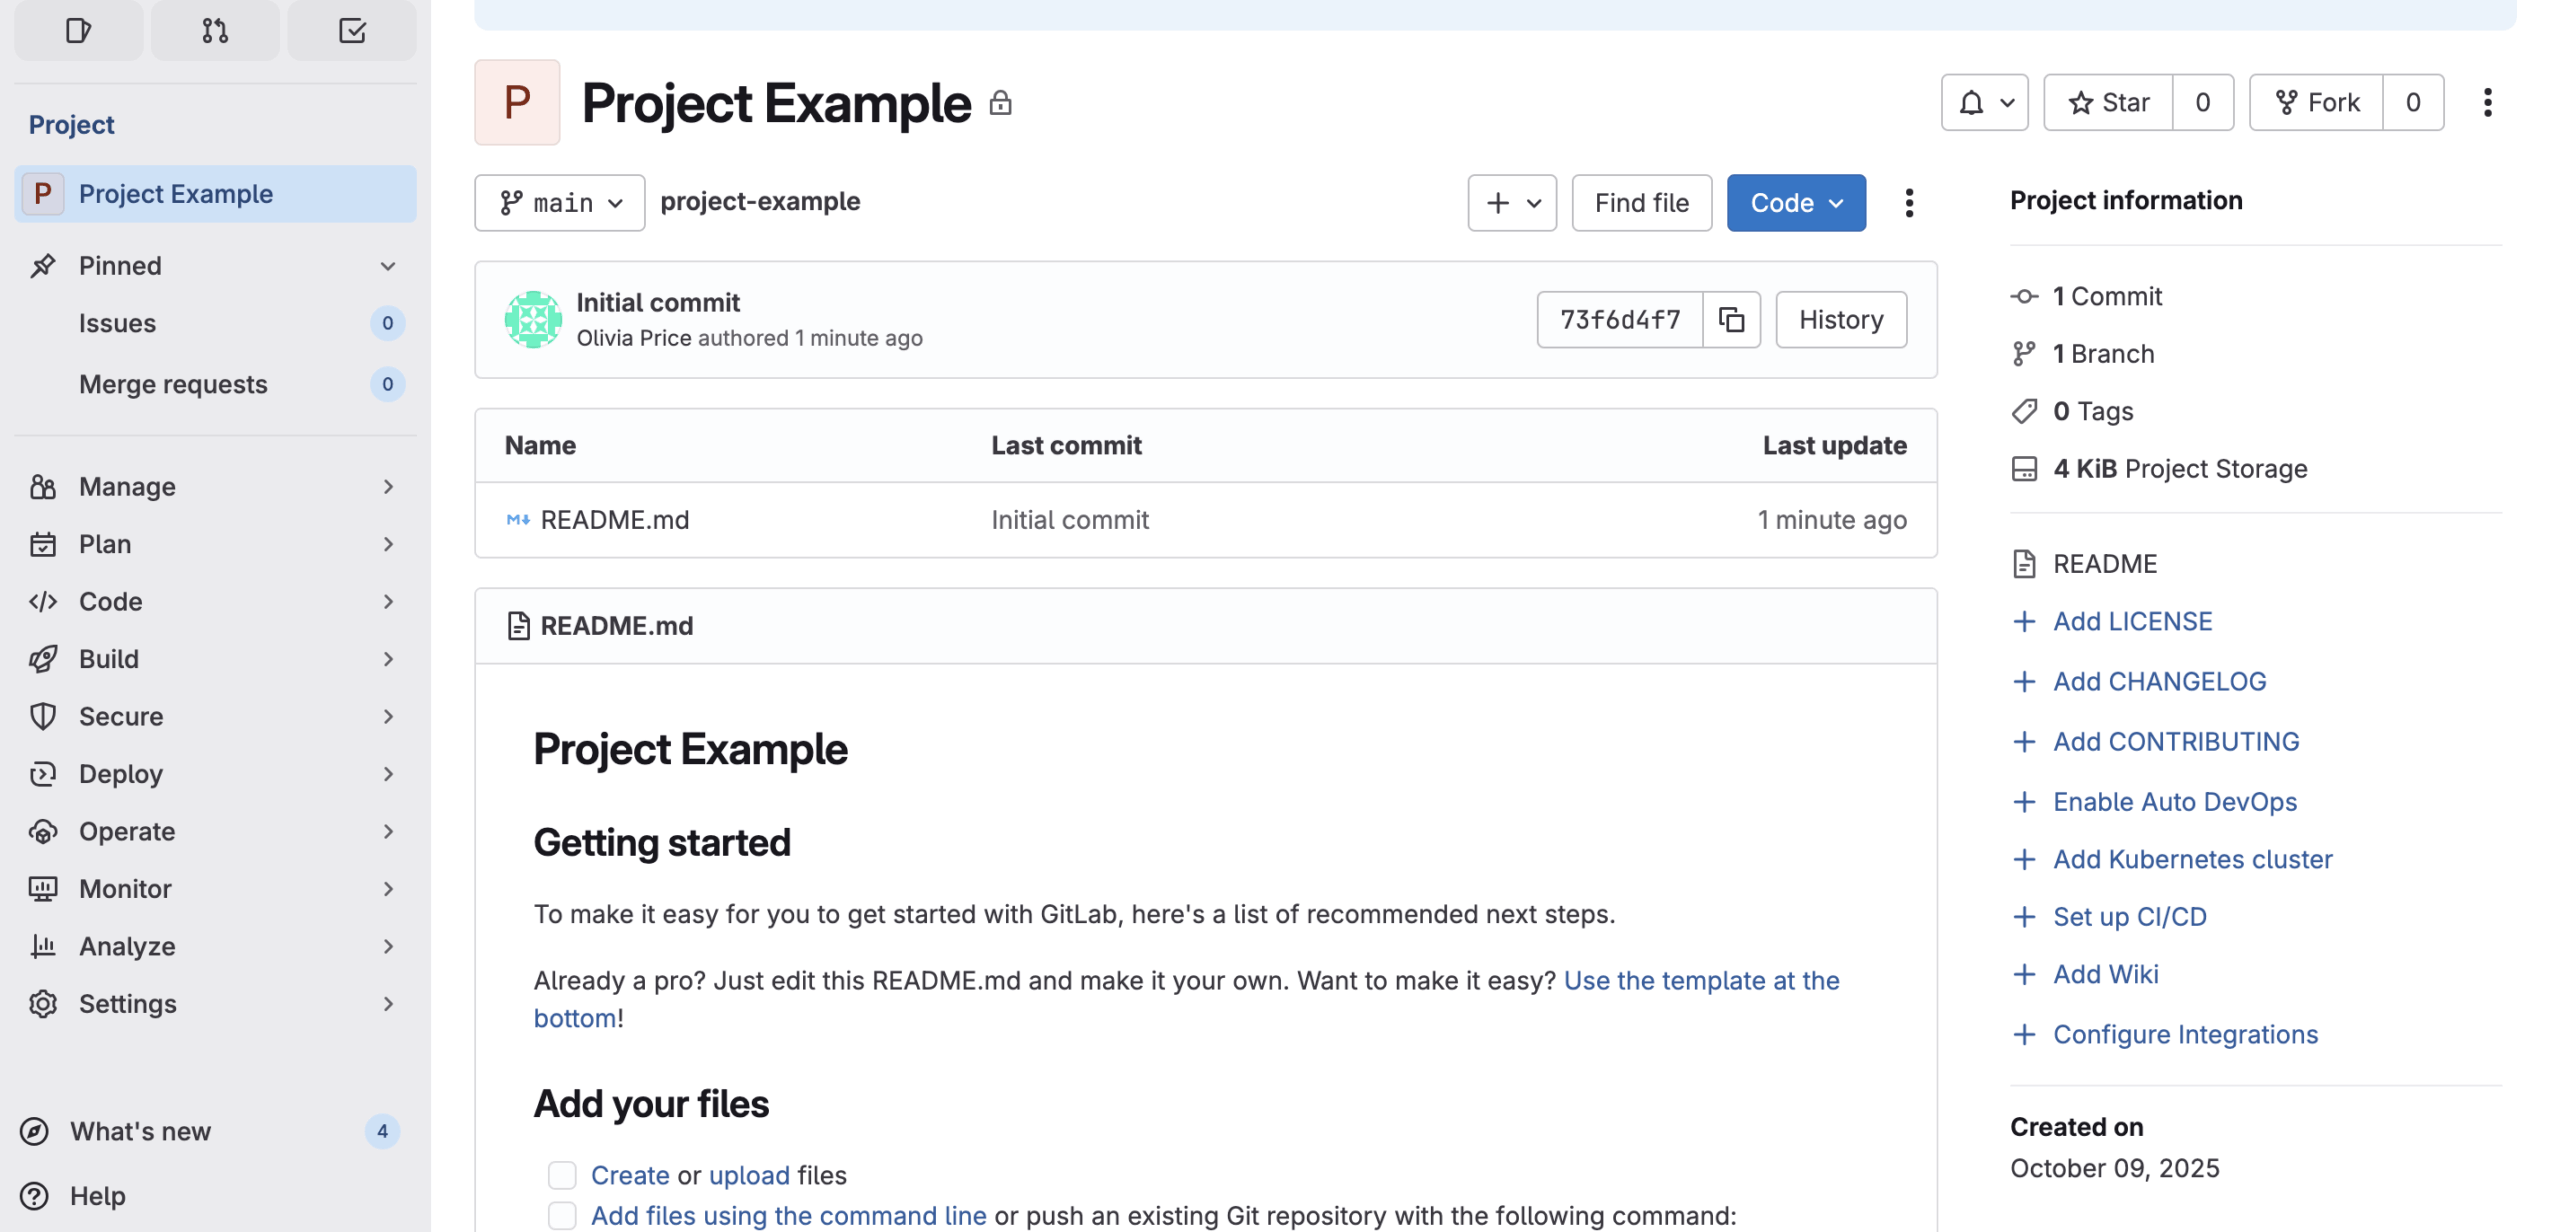
Projects
- A project is where your code lives. It contains your Git repository, issues, merge requests, wikis, and CI/CD pipelines.
- Each project focuses on a specific application, service, or deliverable.
- Think of it as your workspace for writing, reviewing, and releasing code.
Groups
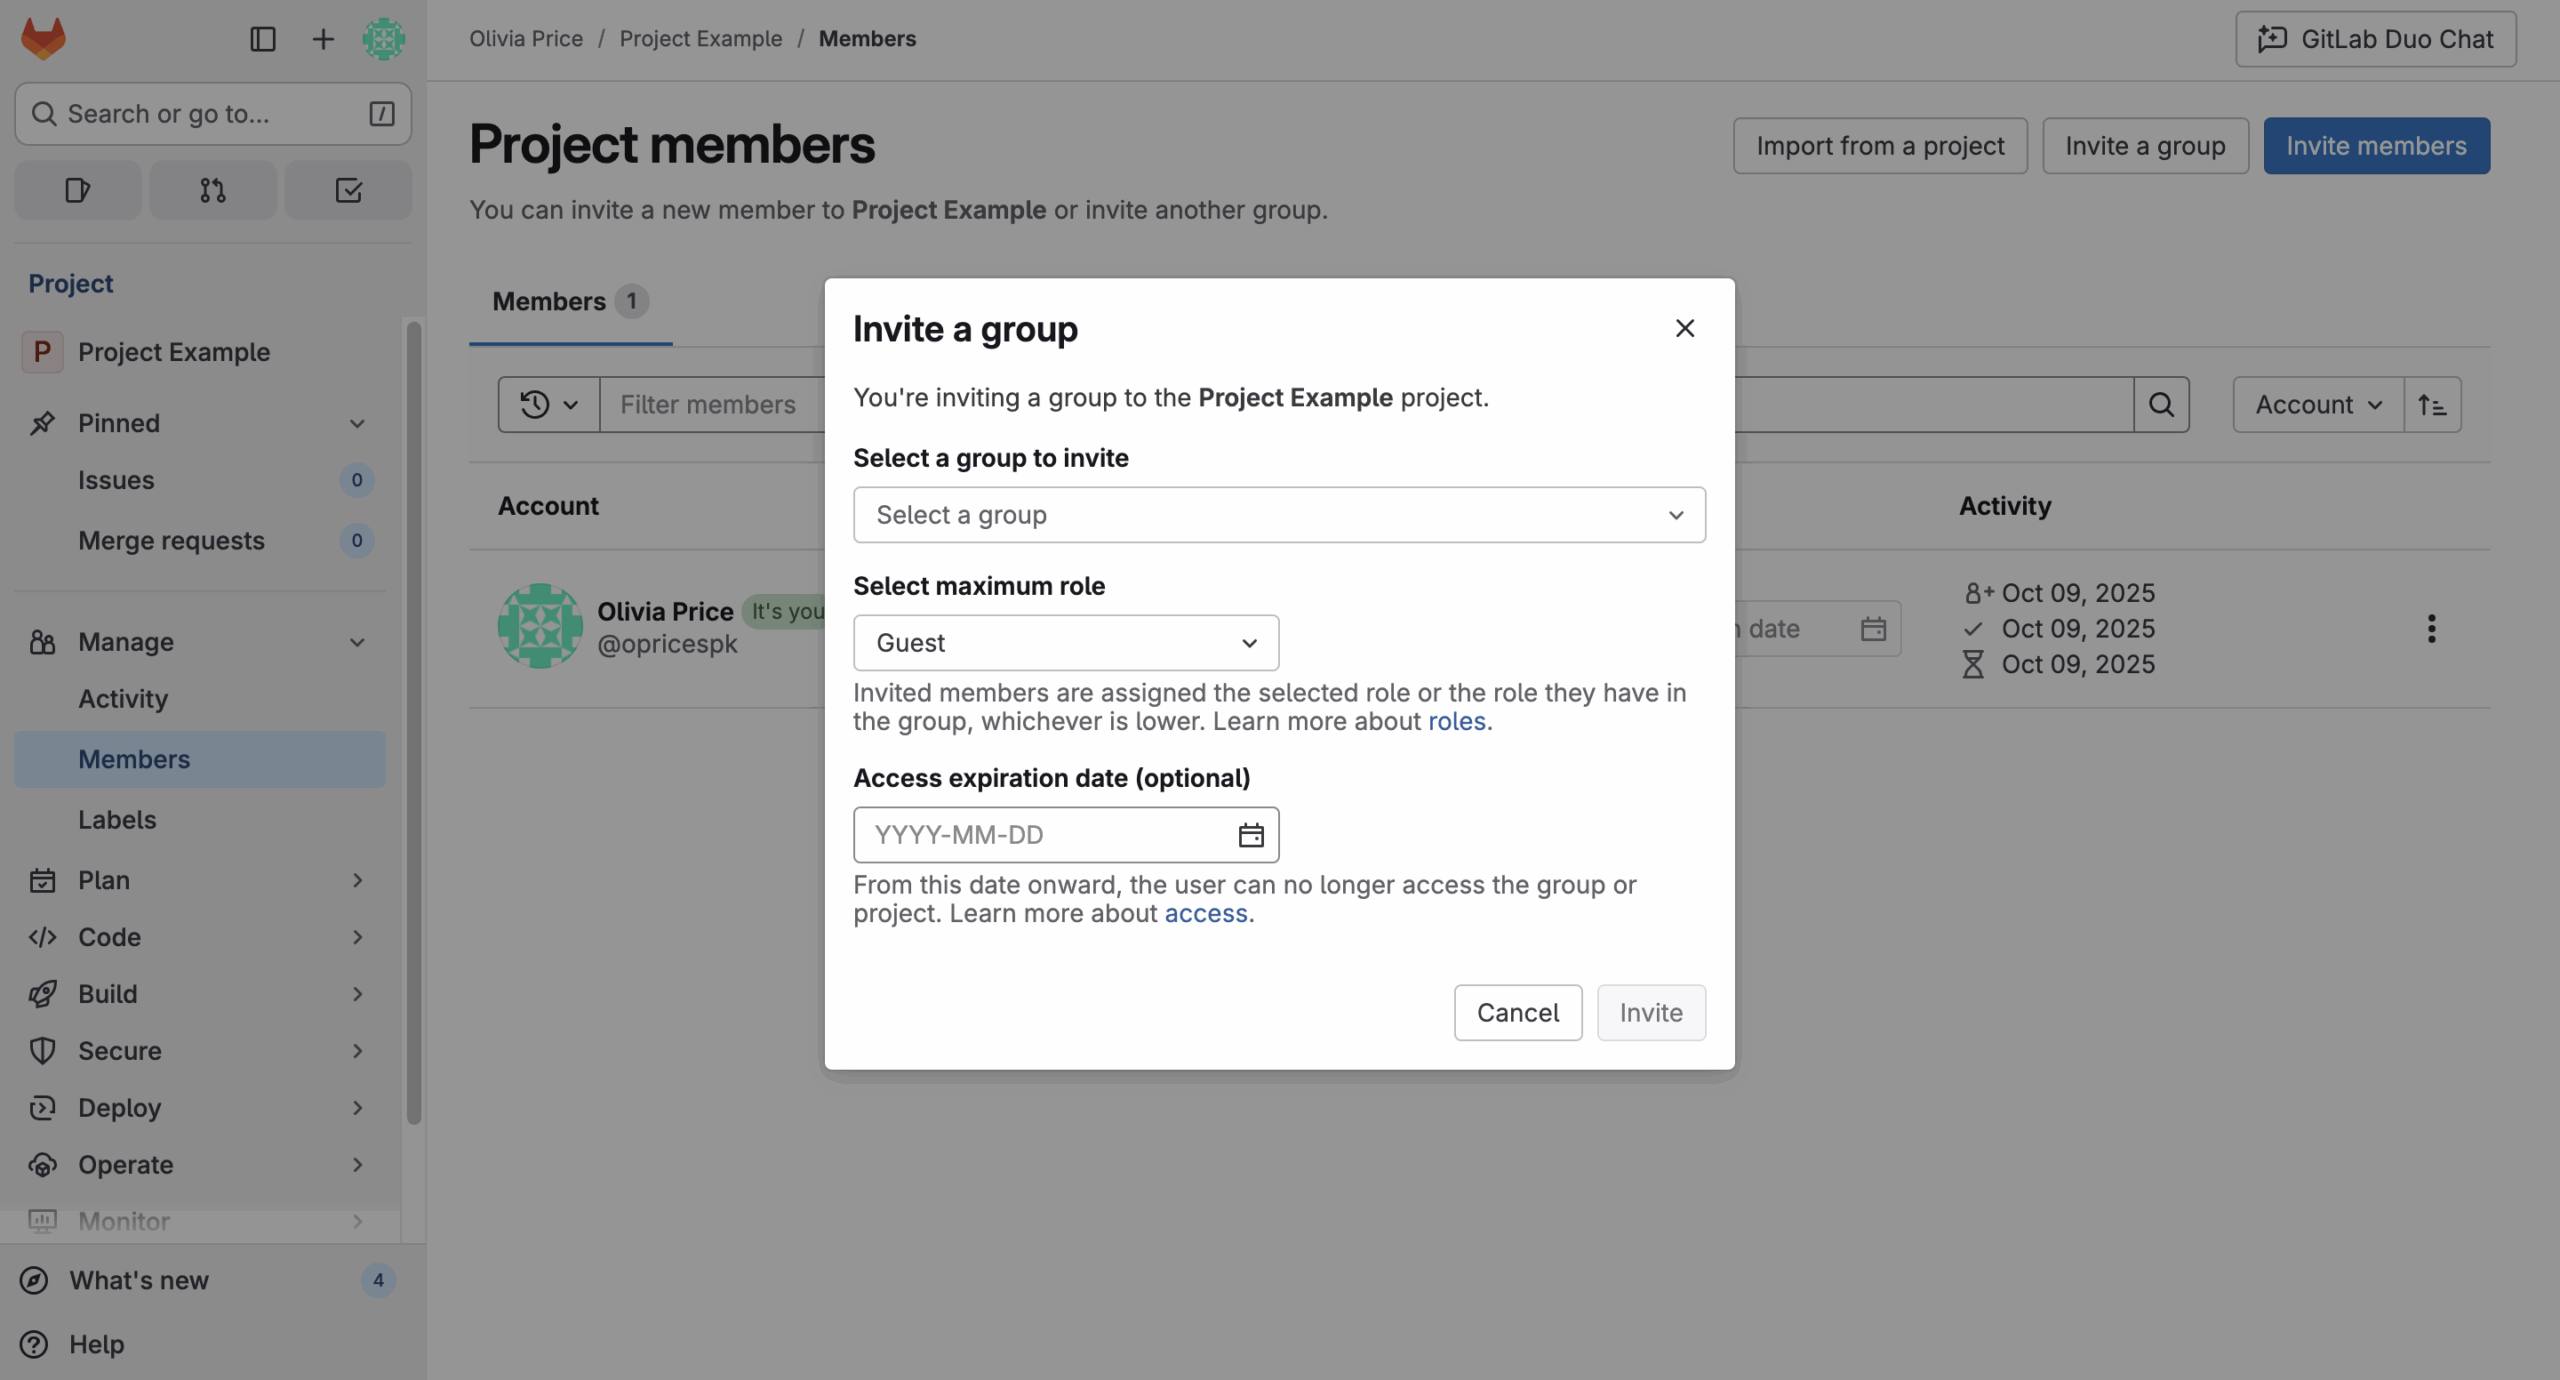
- A group is an organizational container that holds multiple projects.
- Groups make it easy to manage permissions, configurations, and policies for multiple projects at once.
- You can create subgroups such as Company > Department > Team > Project to reflect your real-world hierarchy.
- Members added to a group automatically gain access to all projects under it, based on their assigned role.
Issues, Merge Requests, and Pipelines
GitLab integrates collaboration directly into your code lifecycle:
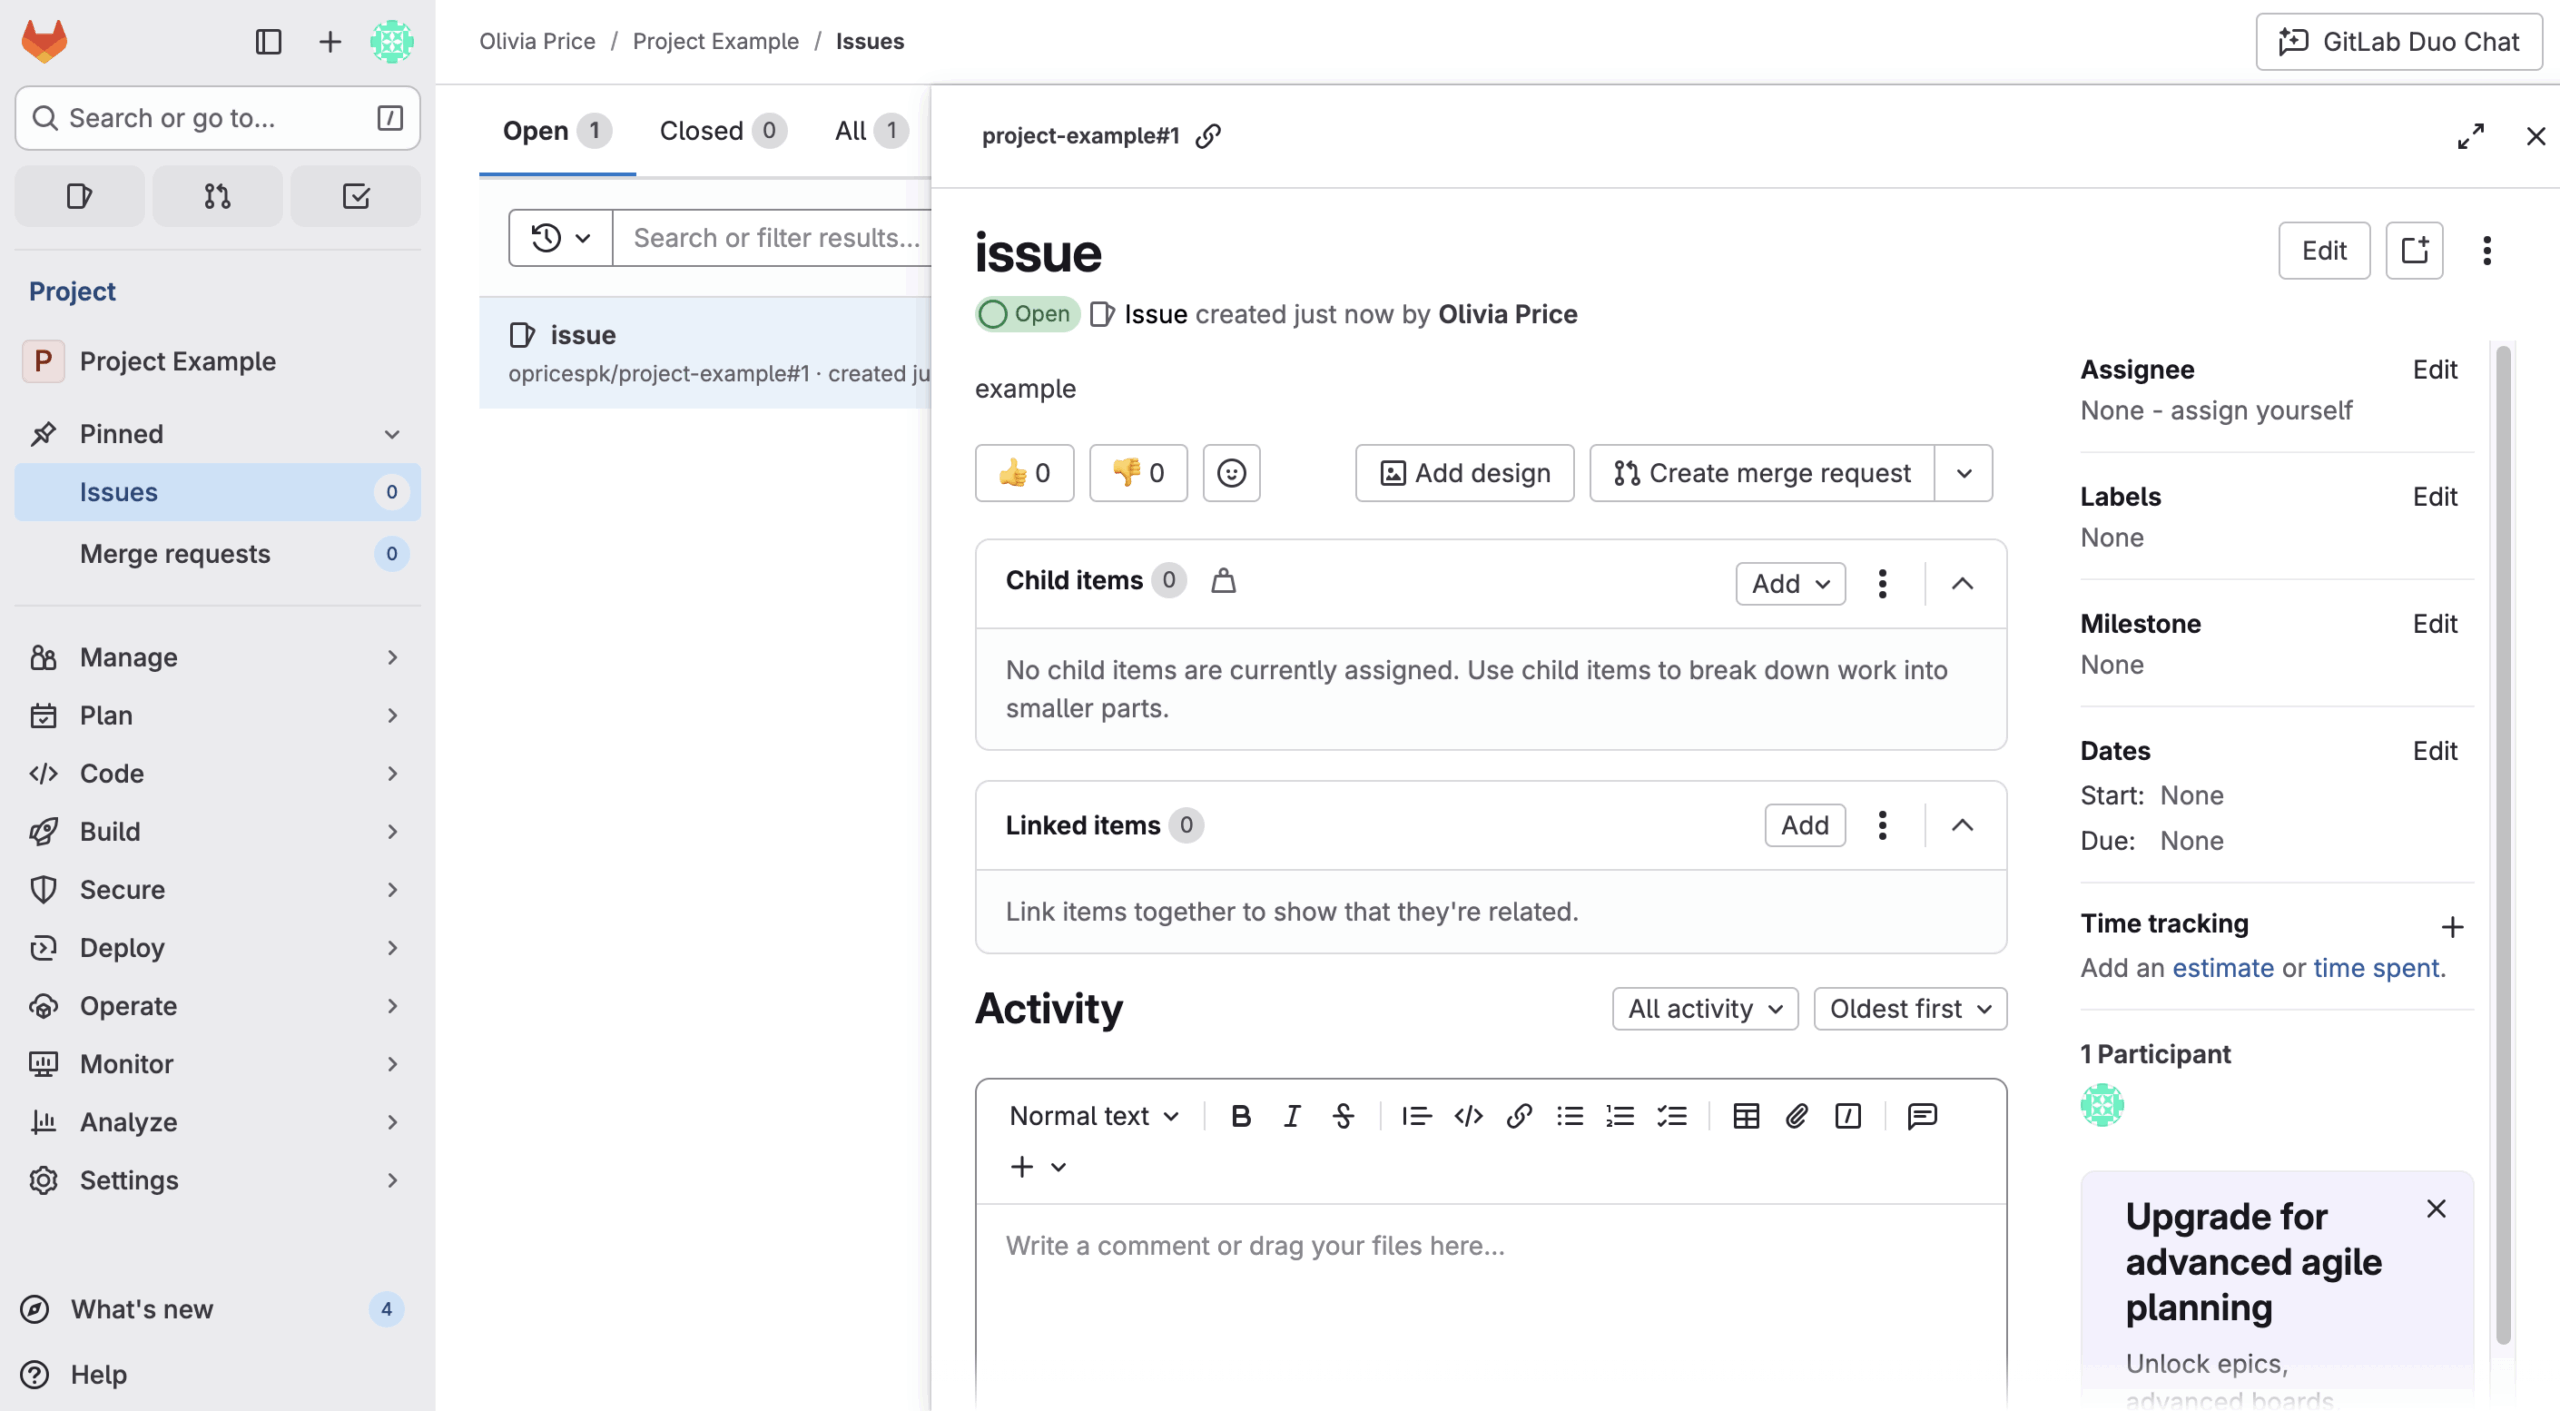
- Issues track bugs, features, and tasks, linking directly to merge requests.
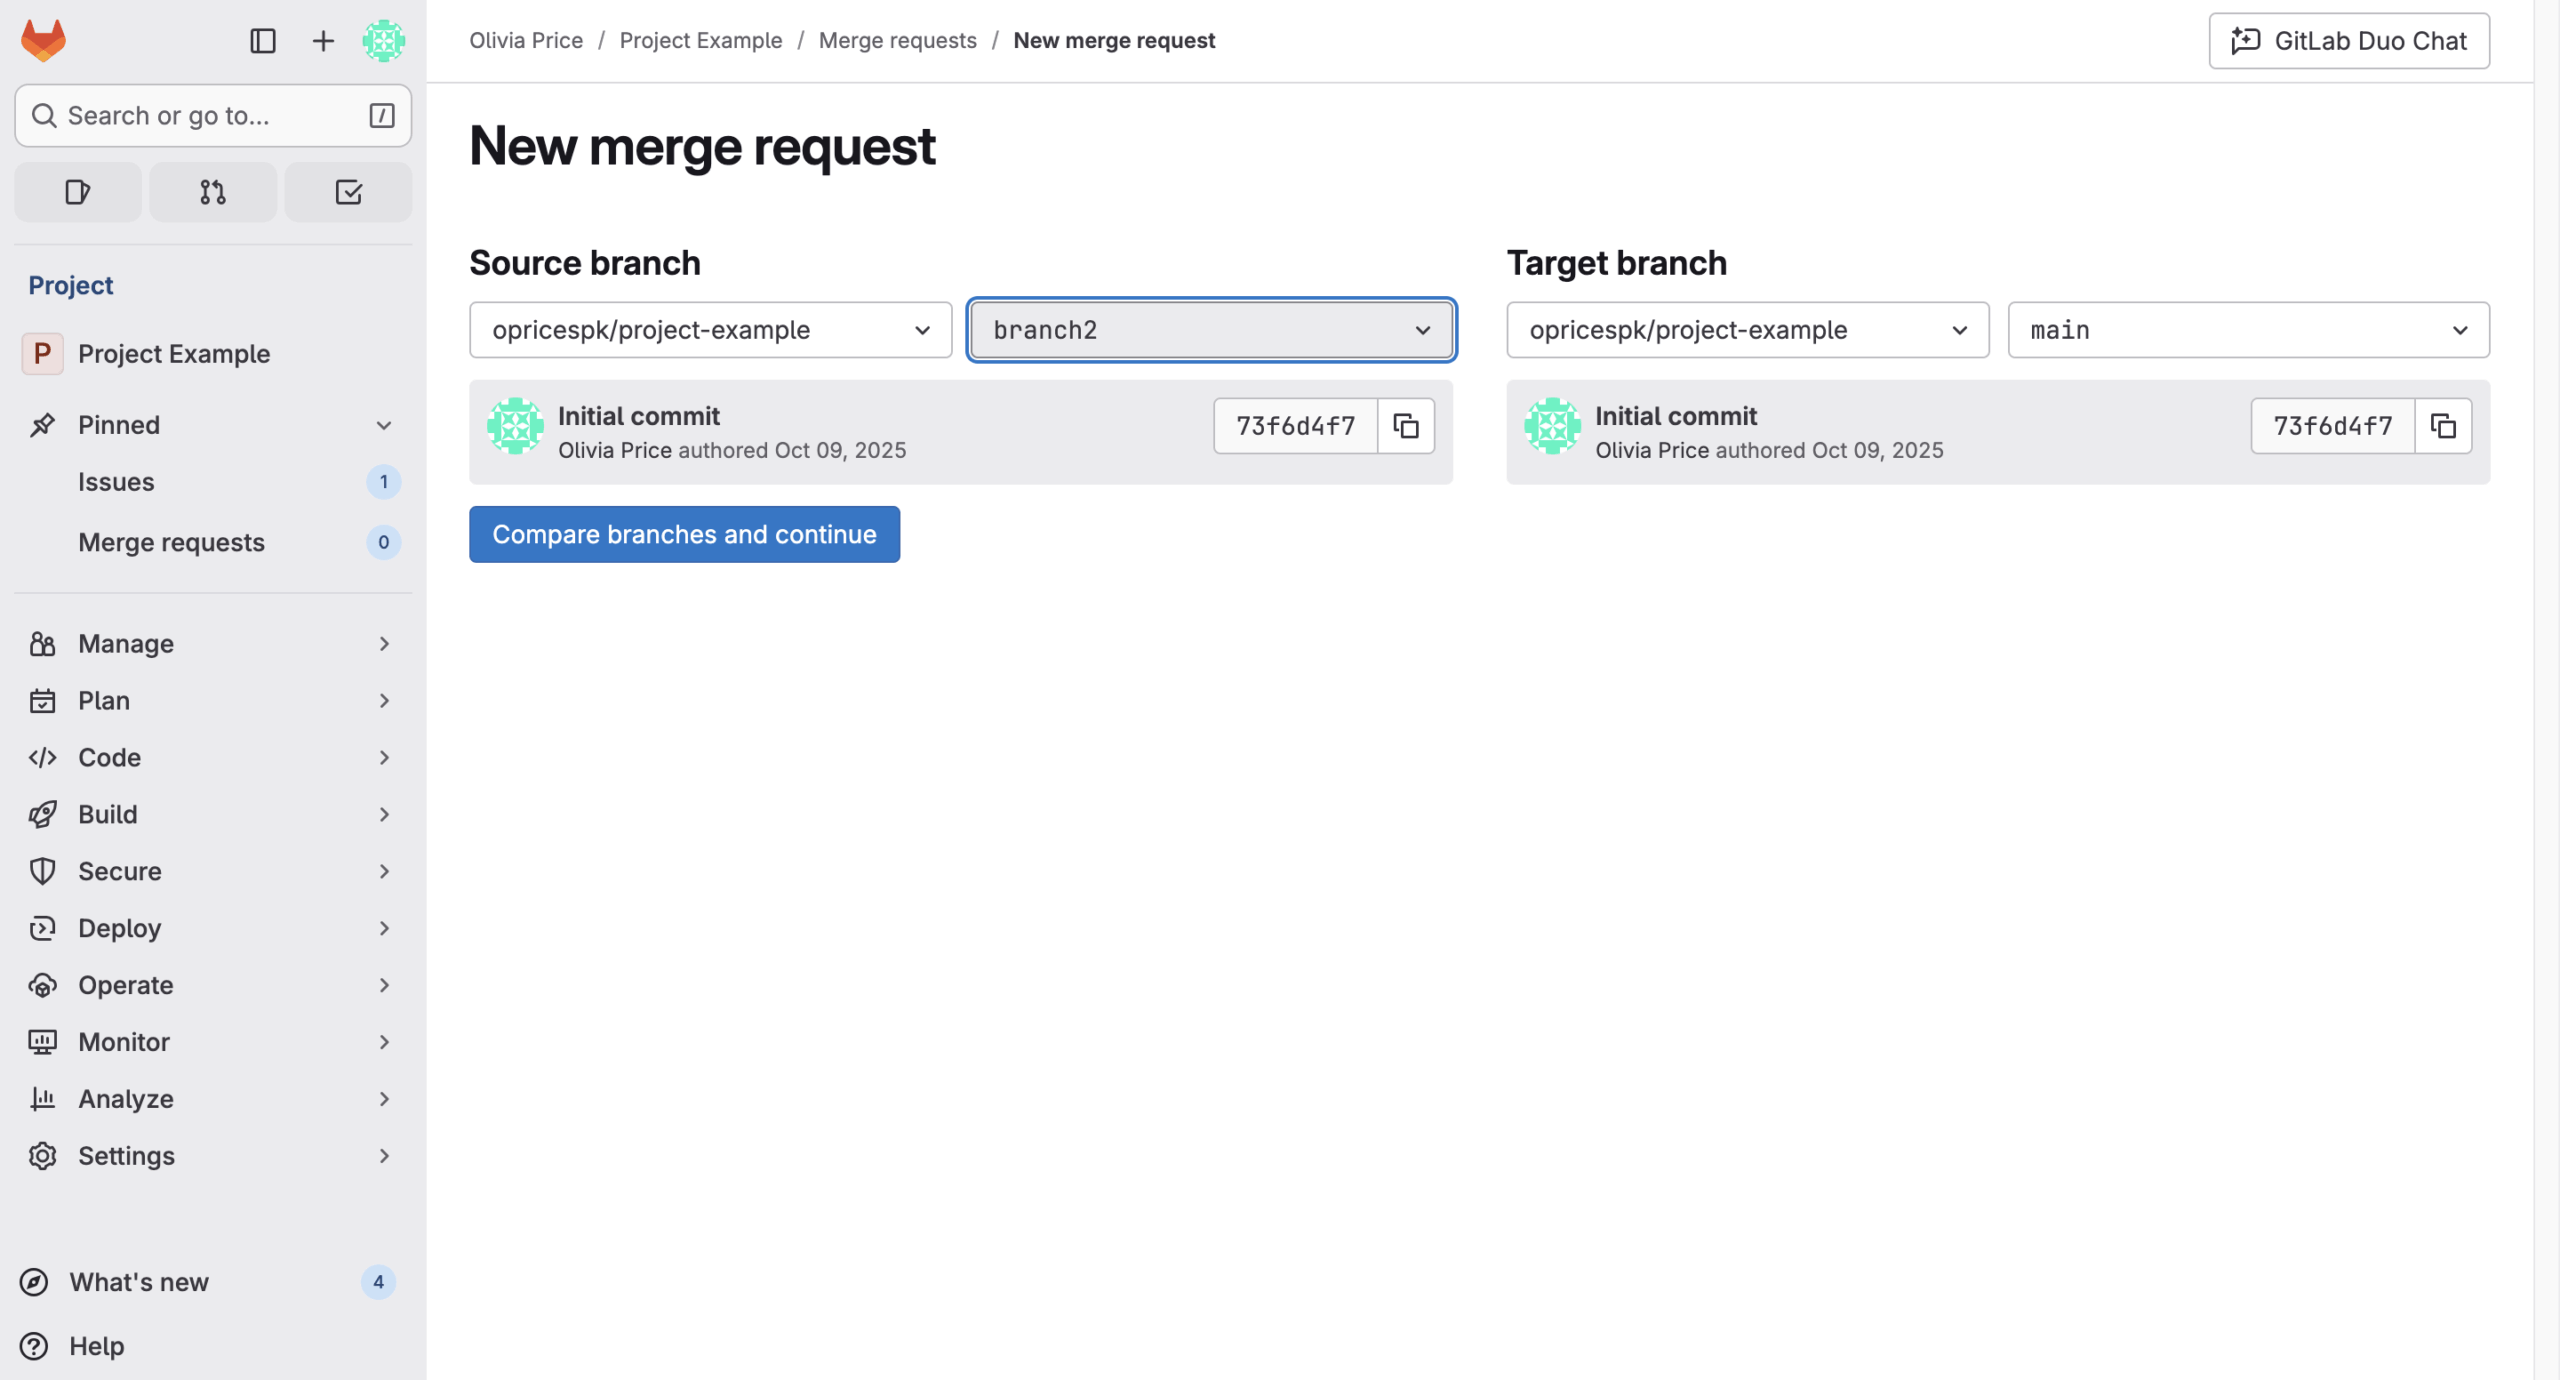
- Merge Requests are how developers propose code changes. They’re reviewed, discussed, and approved before being merged into the main branch.
- Pipelines automate what happens after you push code. Using the .gitlab-ci.yml file, GitLab runs stages like build, test, and deploy automatically, ensuring code quality and reliability.
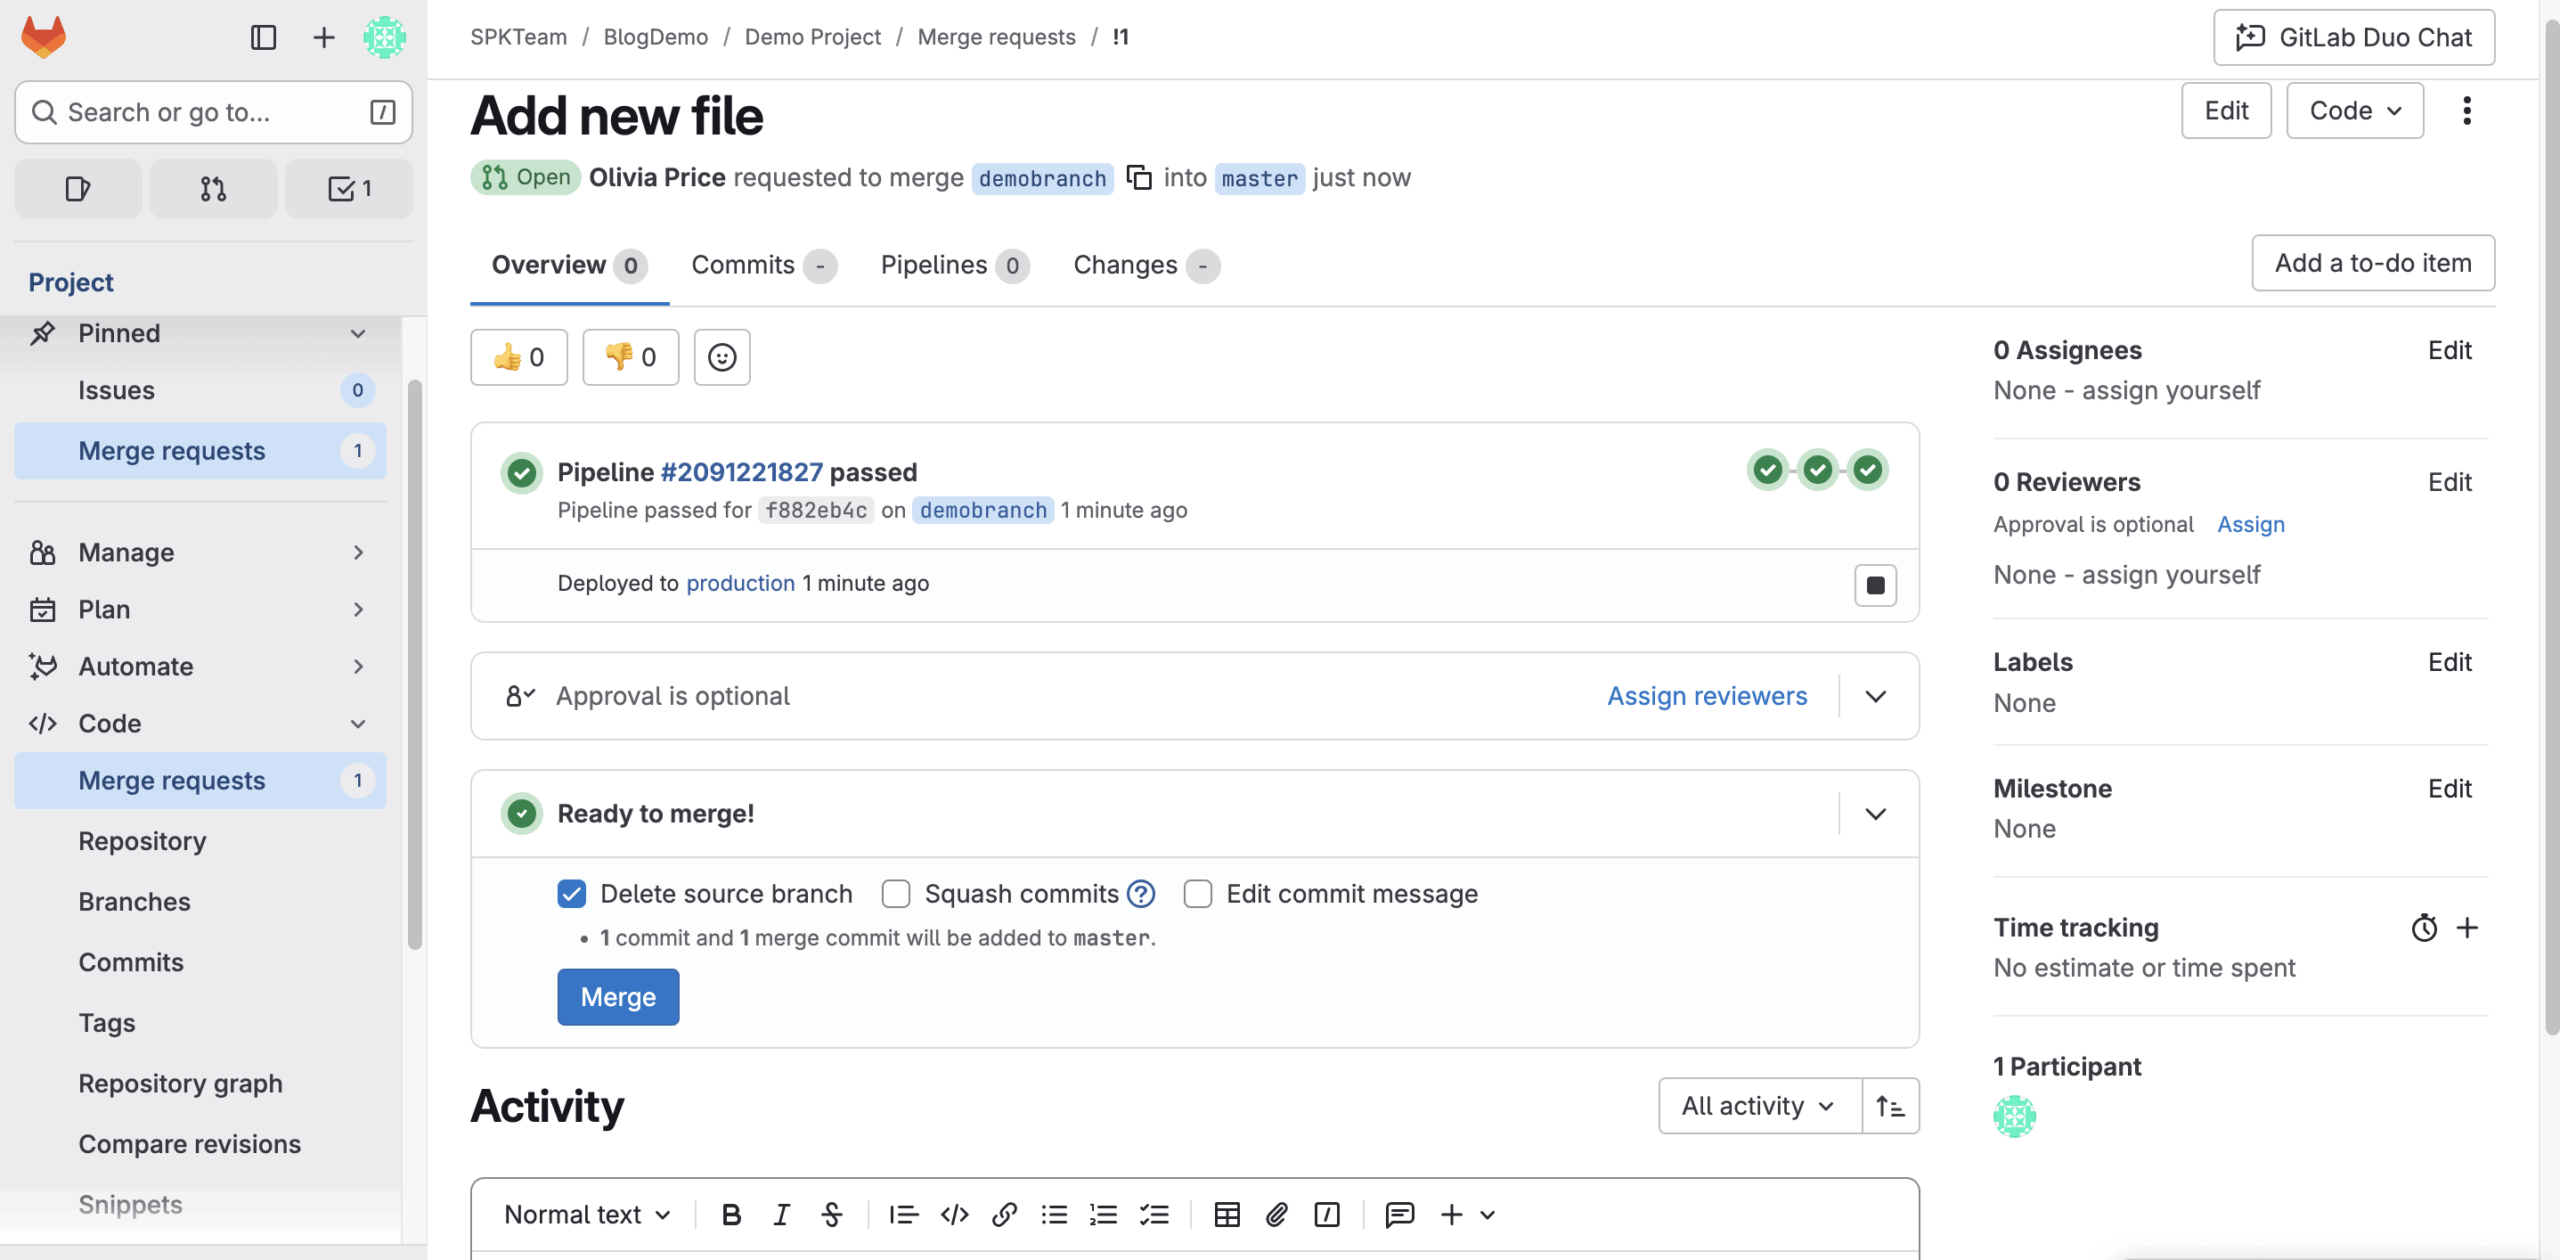
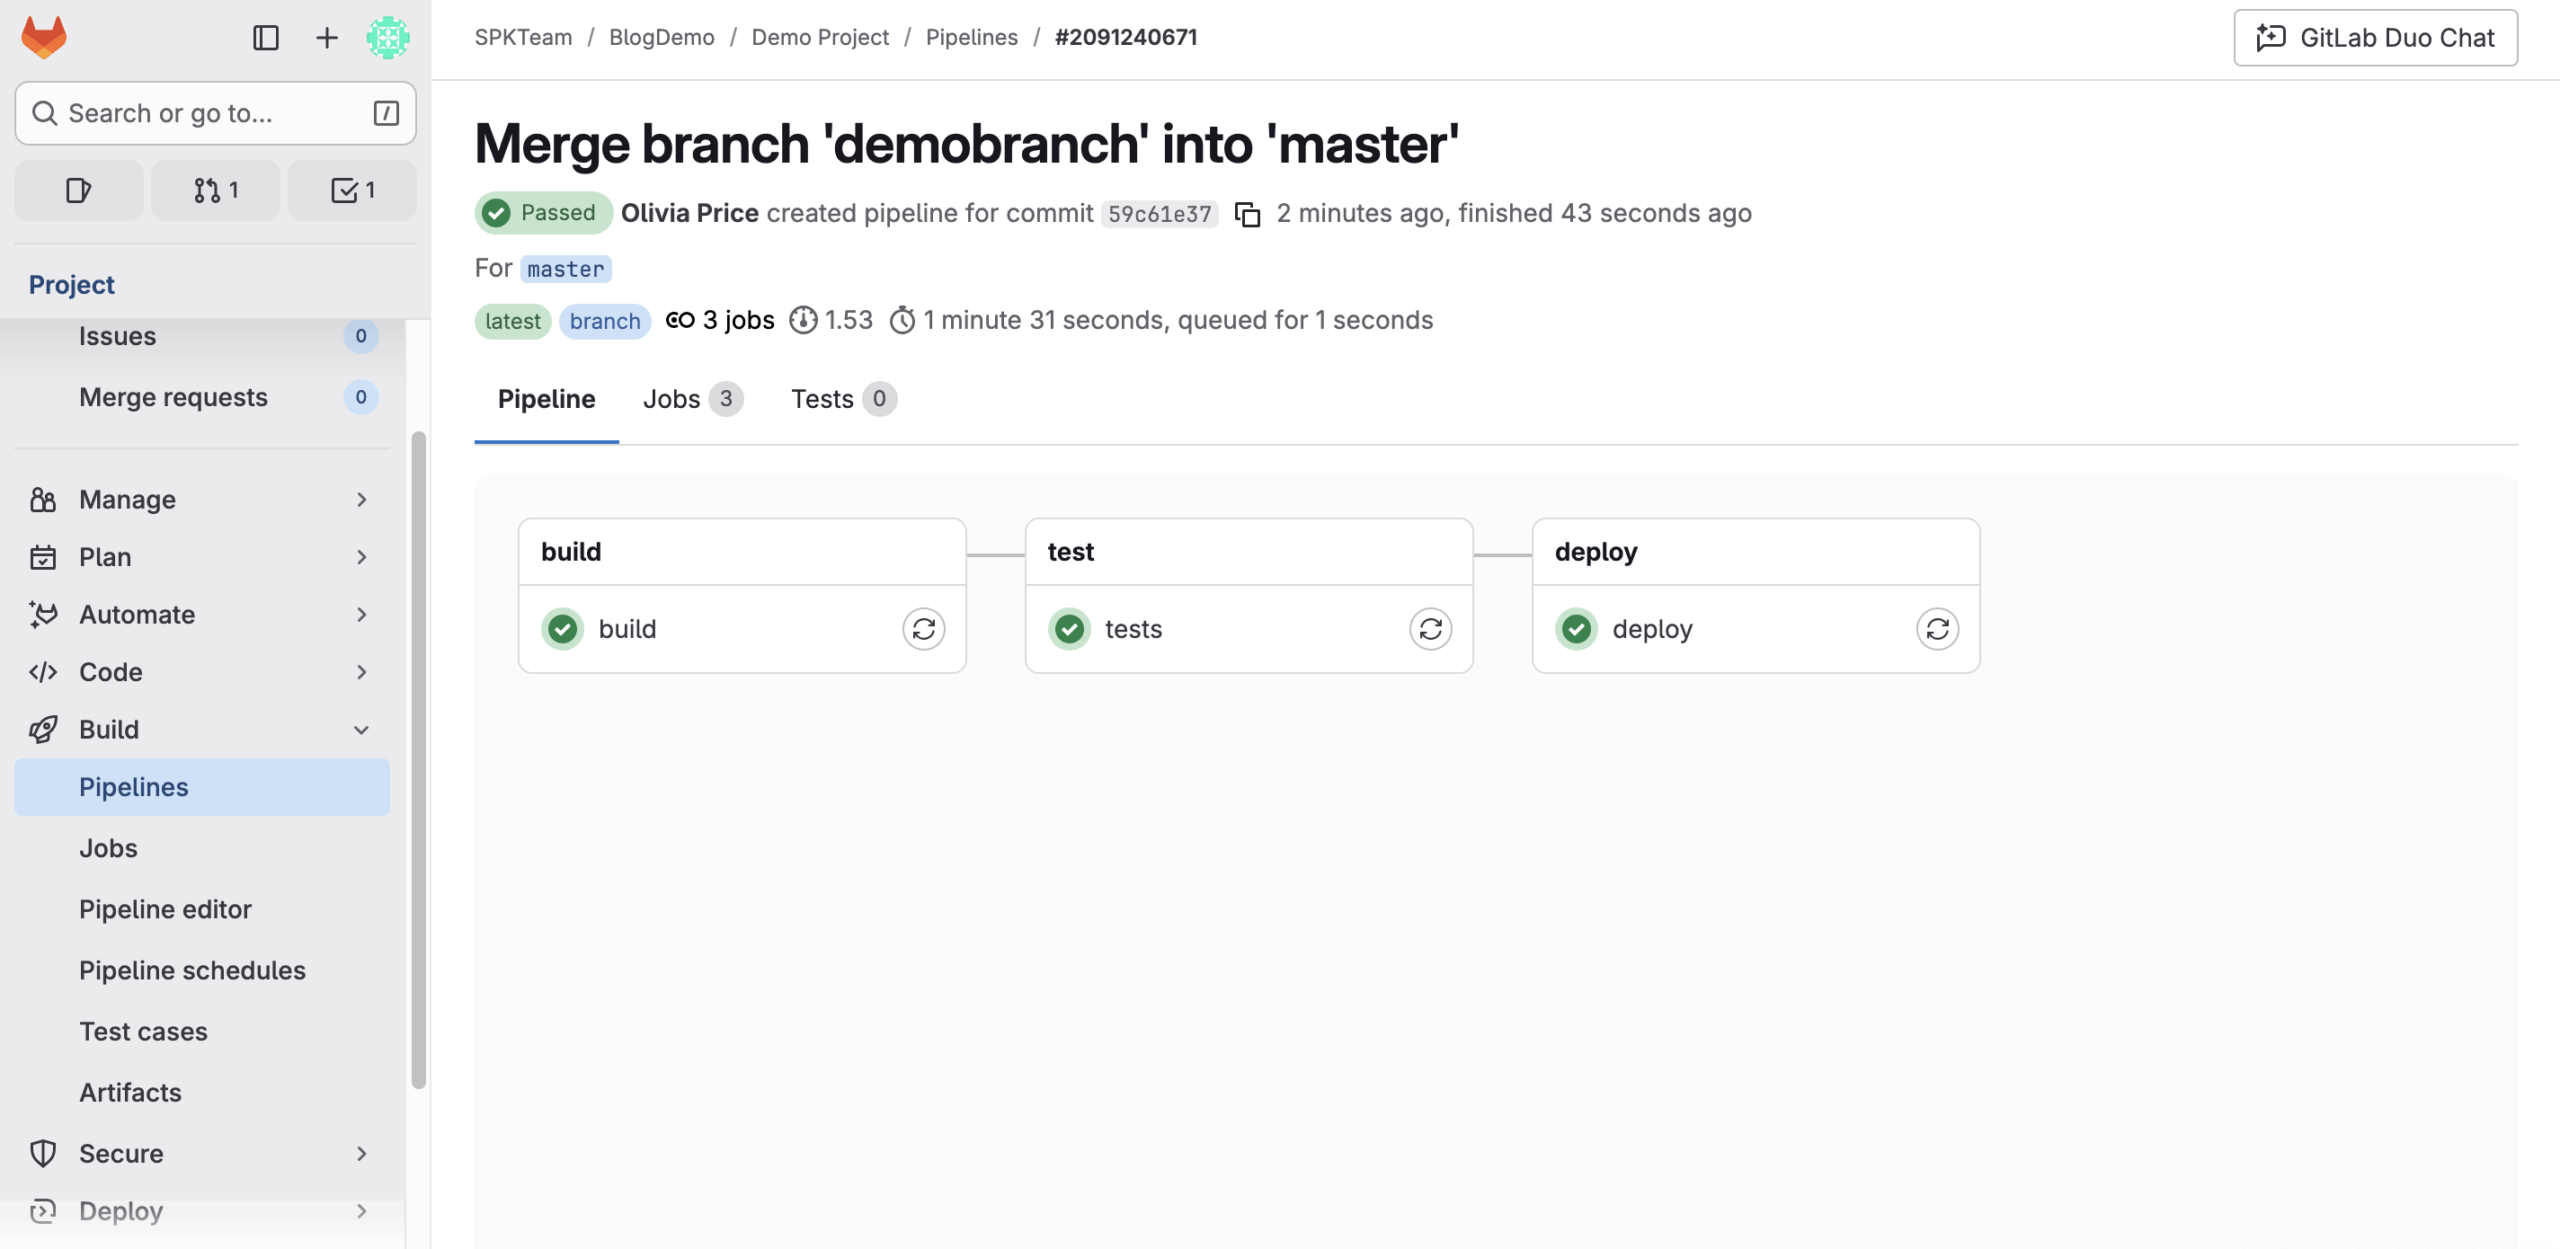
Each merge request can trigger its own pipeline, giving instant feedback on whether the new code passes tests or breaks something critical.
GitLab Runners
A GitLab Runner is the engine that executes your CI/CD jobs. When you define a pipeline in .gitlab-ci.yml, runners pick up those jobs and run them on available compute resources.
- GitLab.com (SaaS) offers shared runners for free, especially for public projects.
- Self-managed environments require you to install and maintain your own runners, giving you control over the infrastructure, dependencies, and performance.
Roles & Permissions
GitLab’s permission model is more nuanced than simple admin/read/write roles used in other platforms. You can assign roles at both group and project levels, including:
- Guest – view limited project info
- Reporter – read access and limited write privileges (e.g., comment on issues)
- Planner – hybrid of guest and reporter roles but designed for those who need access to planning workflows.
- Developer – commit code and create merge requests
- Maintainer – manage settings, pipelines, and members
- Owner – full control over group or project
Special user types like External, Auditor, and Administrator add additional control, especially for regulated or enterprise environments.
Visibility Settings
Every project and group in GitLab can be set to one of three visibility levels:
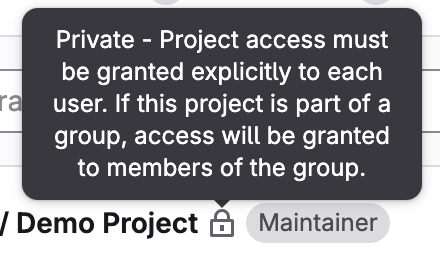
- Private – visible only to invited members
- Internal – visible to any authenticated user
- Public – visible to everyone
Visibility settings cascade, meaning subgroups and projects cannot have higher visibility than their parent group. This ensures consistent access control across the organization.
GitLab.com vs. Self-Managed GitLab
There are two main types of GitLab: SaaS and Self-managed. Teams may also choose between GitLab Free, Premium, or Ultimate.
Why choose one over the other?
- GitLab.com (SaaS) eliminates server management overhead and is perfect for fast starts or smaller teams.
- Self-managed GitLab (Community or Enterprise Edition) offers data sovereignty, compliance, and integration control. It is ideal for regulated industries like healthcare or defense.
Creating a New Project in GitLab
- Create a new project: In GitLab, a project hosts your repo, issues, MRs, CI/CD, etc. From the left sidebar, select Create new → New project/repository, then choose blank, import, or a template, set the visibility (private/internal/public), and create it.
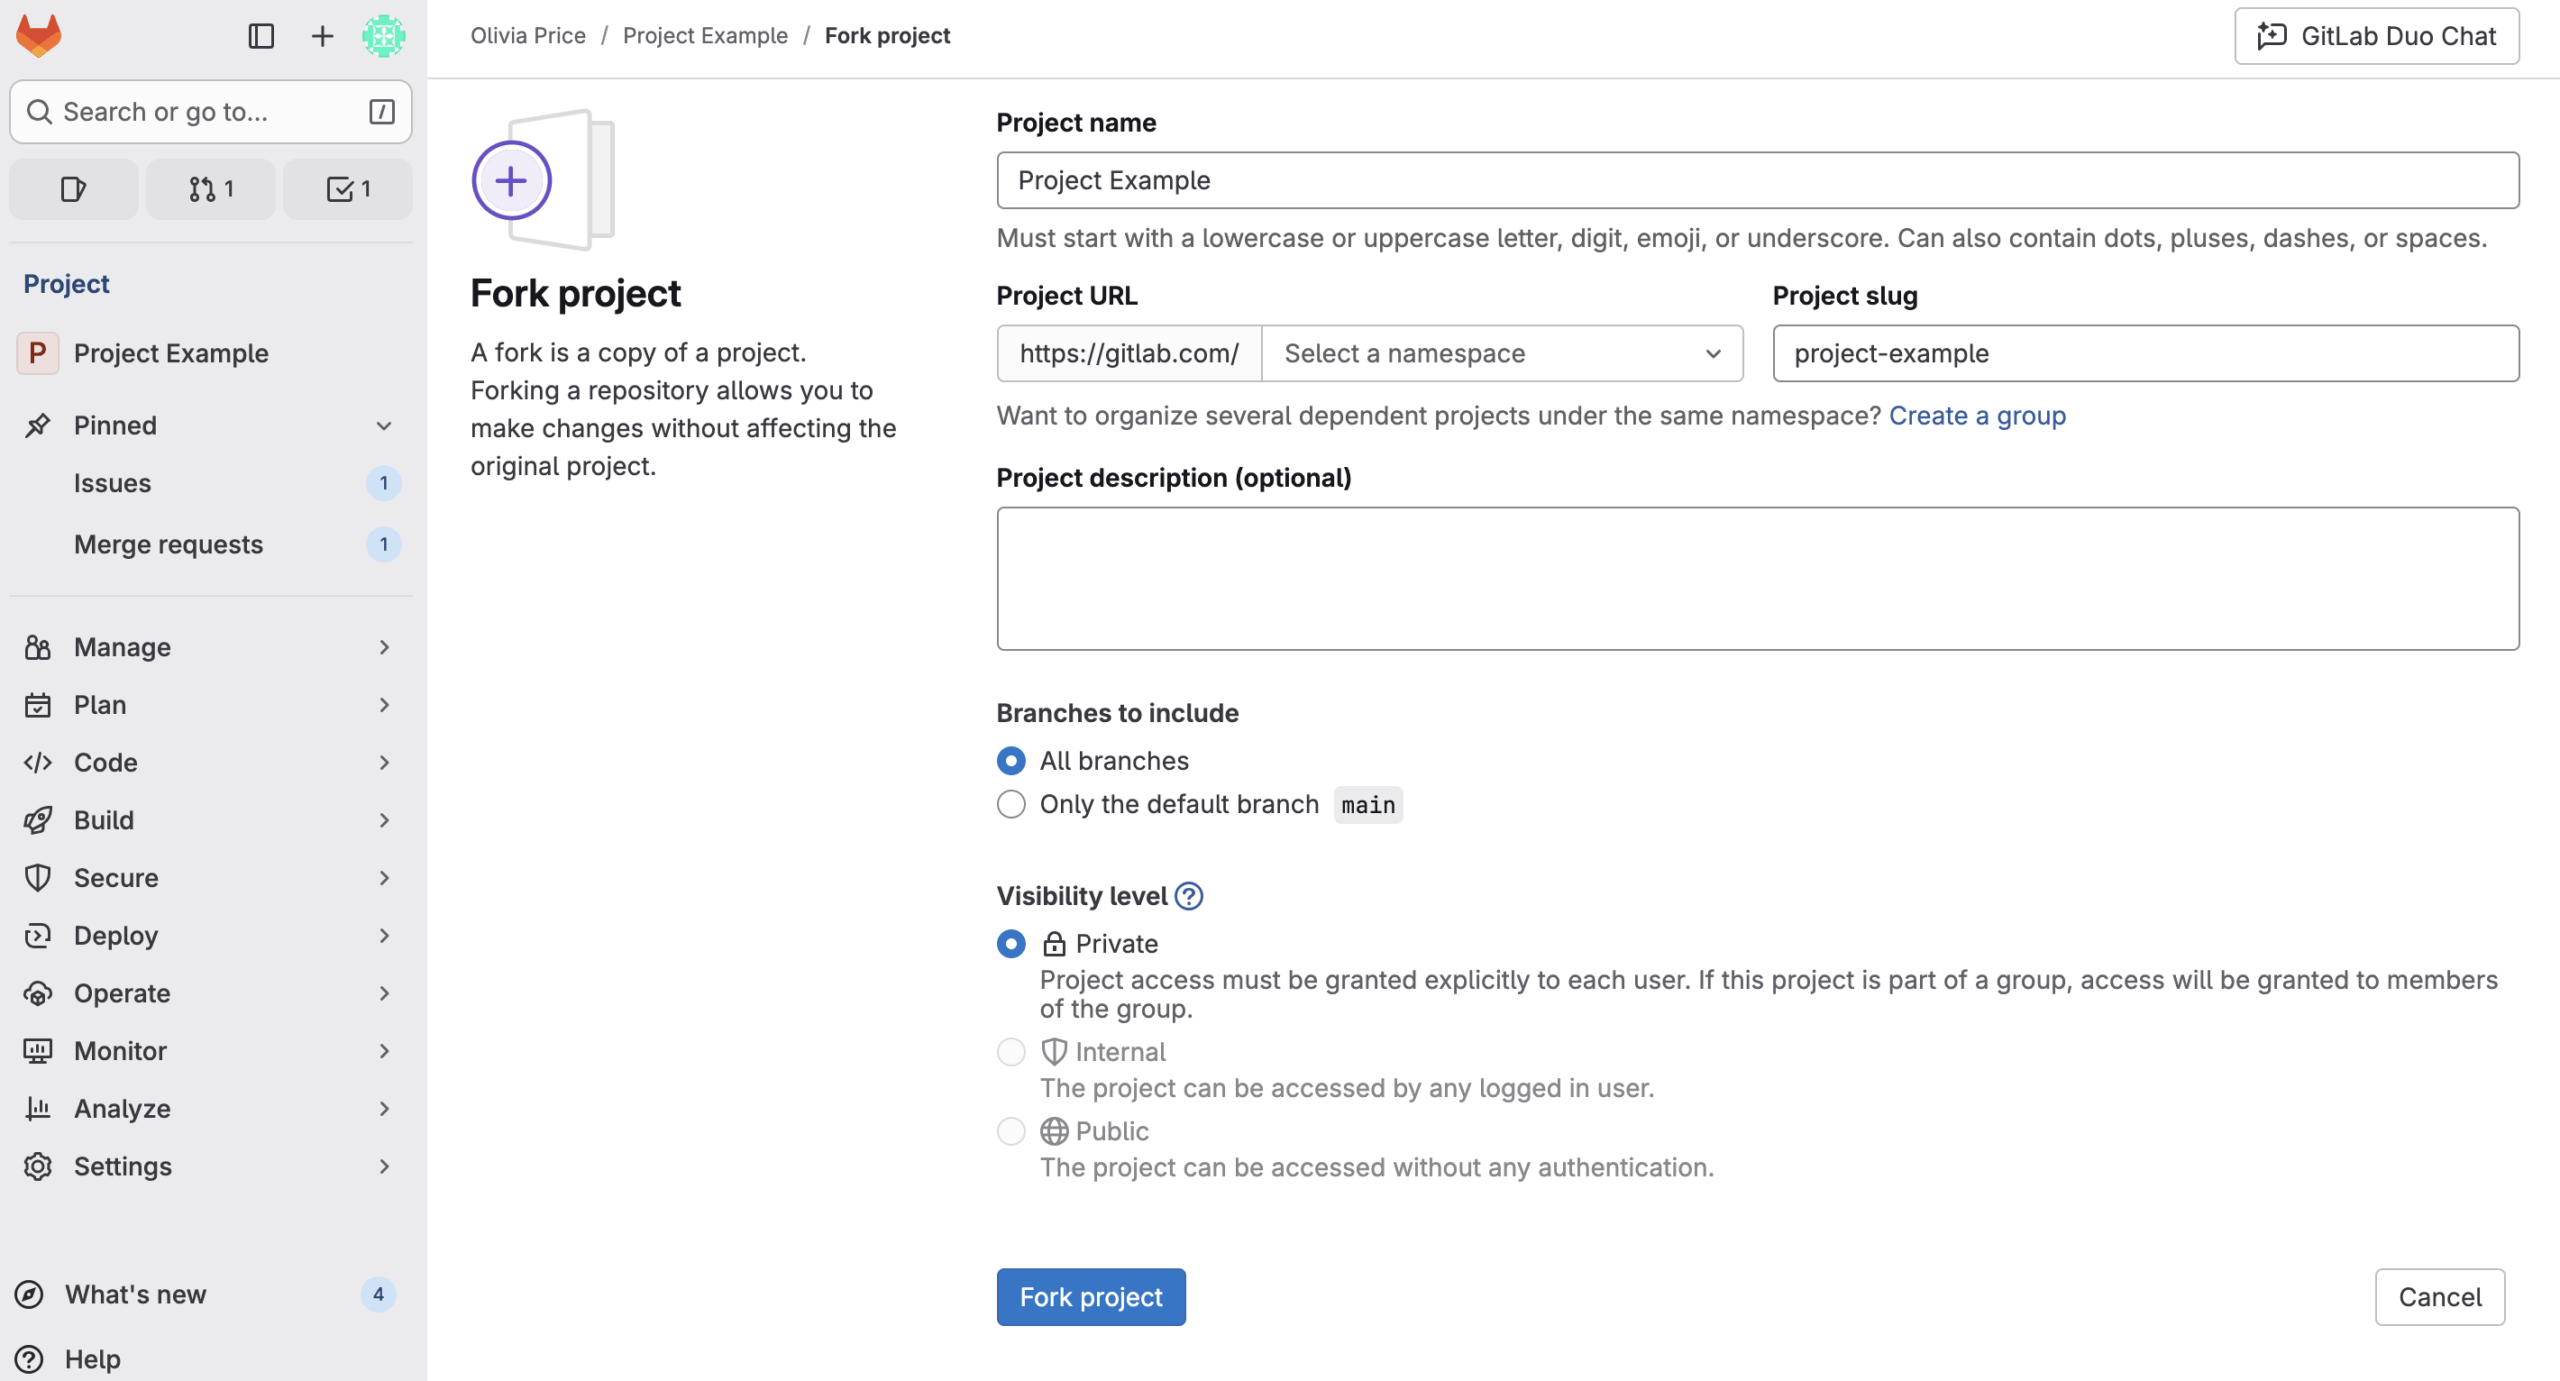
- Fork an existing project: On the project page you want to copy, click Fork (top-right), choose your namespace (personal or group), optionally rename/slug, and fork all branches (default). Forking lets you contribute without write access to the original.
Tip: If you forked, add the original repo as an “upstream” remote so you can pull updates later
git remote add upstream https://gitlab.com/original-owner/original-project.git
git fetch upstream
git merge upstream/main # or: git rebase upstream/main
Clone the Project Locally
Clone with HTTPS (or SSH if you’ve added an SSH key):
git clone https://gitlab.com/your-name/your-project.git
cd your-project
If you forked, you’ll usually push back to origin (your fork). Keep upstream (the original) for syncing, as above.
Create a Branch and Make Changes
Create a feature branch off the default branch (often main):
git checkout -b feature/short-description
# edit files …
git status
Naming conventions like feature/, bugfix/, hotfix/ keep your repo tidy. If your team uses issues, mention them in branch names or commit messages (e.g., feature/123-improve-logging) to help cross-link work.
Commit and Push
Stage, commit with a clear message, and push:
git add .
git commit -m “feat(logging): add request correlation IDs (#123)”
git push origin feature/short-description
- Use concise, present-tense commit messages.
- If you forked, you’ll push to your fork (origin). You’ll open the merge request from your fork back to the parent project.
Creating and Running Your First Pipeline
Ensure You Have Runners Available
If you’re using GitLab.com, you can skip this step. For self-managed setups, ensure you have at least one active runner.
To view available runners:
- Navigate to your project.
- Select Settings > CI/CD.
- Expand Runners.
If you see at least one runner with a green circle, you’re good to go.
Create a .gitlab-ci.yml File
The .gitlab-ci.yml file is the heart of your CI/CD configuration. It defines:
- The structure and order of jobs to execute.
- The conditions and logic for when they run.
If you need an example of code to run, check out this tutorial. Commit the changes to start your first pipeline.

View Your Pipeline Results
Once you commit .gitlab-ci.yml, GitLab automatically runs your jobs.
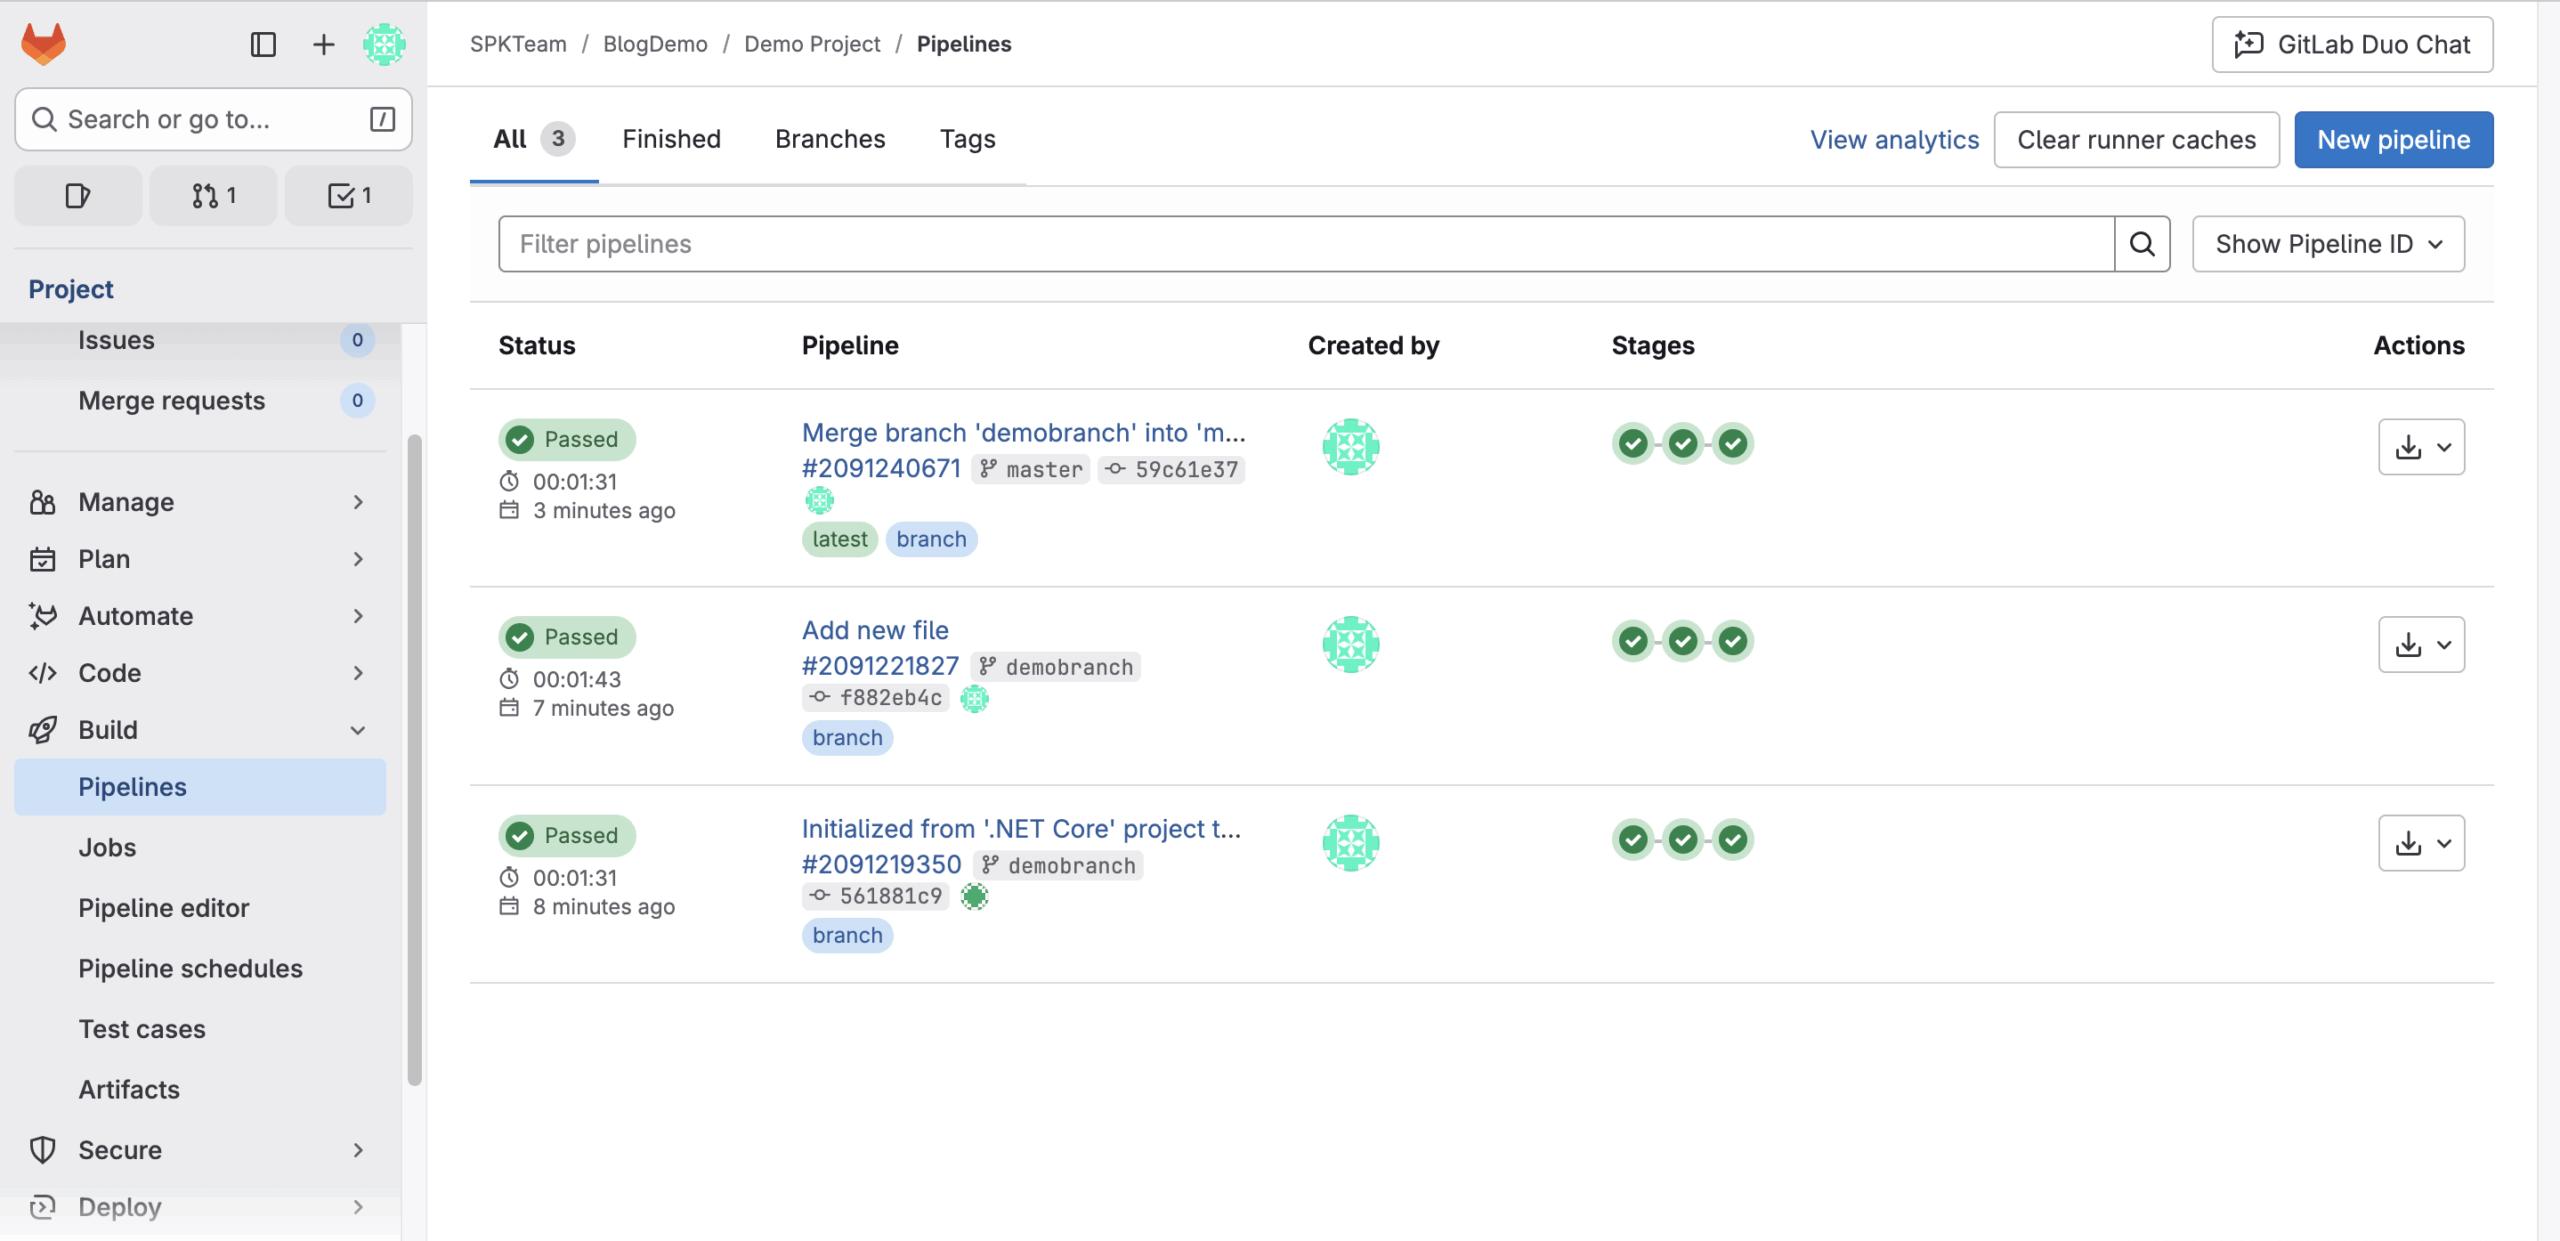
- Go to Build > Pipelines to see your running and completed pipelines.
- Click a pipeline ID for a visual representation of the stages and jobs.
- Click any job name (e.g., deploy-prod) to view detailed logs and output.
If everything runs successfully, you’ve officially created your first GitLab CI/CD pipeline.
Getting Started with CI/CD
GitLab automatically detects a .gitlab-ci.yml file at your repository root.
This YAML file defines the jobs and stages your pipeline will run. For example:
stages:
  - build
  - test
  - deploy

build-job:
  stage: build
  script:
    - echo "Building the project"
  test-job:
  stage: test
  script:
    - echo "Running tests"
deploy-prod:
  stage: deploy
  script:
    - echo "Deploying application"
When you commit this file, GitLab immediately runs the pipeline. You can use artifacts to store build outputs or caching to speed up repeated tasks, making pipelines faster and more efficient.
Merge to main
Once pipelines are green and approvals are satisfied, you can merge. GitLab supports several merge methods:
- Merge commit (default) keeps the branch history.
- Squash & merge condenses your branch into one commit (cleaner history).
- Fast-forward only disallows merge commits; requires your branch to be up-to-date/rebased first.
If your pipeline includes deployment stages, merging to main can automatically deploy to staging/production via environments.
Ready to Implement GitLab for Your Organization?
GitLab is much more than a Git repository. It’s a complete DevOps ecosystem designed to unify code, collaboration, and continuous delivery. Whether you choose the cloud-based GitLab.com or a self-managed deployment, you’ll gain powerful tools to streamline development, enforce compliance, and deliver software faster. At SPK and Associates, we help teams get started with GitLab. We have you covered from installation and configuration to CI/CD setup, license management, and custom automation. Whether you’re migrating from GitHub, Bitbucket, or starting fresh, our experts can help you build a secure, efficient, and scalable DevOps environment with GitLab. If you are interested in utilizing GitLab, contact our experts today.

